This post feels especially timely since Aiden is currently working on toilet learning. I’ve been sharing a bit of our Montesssori inspired toilet learning process on my Instagram stories (@teacherandthetots), but I wanted to share more details of our whole process. Toilet learning is something that I read multiple books and articles about before we started it with Asher a couple of years ago. In all of my reading and the practical experience of going through it with two boys, I have learned that patience and consistency have made the biggest impact on the whole process going smoothly for them. However, I’ll be the first to admit that those two things aren’t always easy to achieve in the practice of toilet learning with a toddler. So, I’ll share some of the practical things that we’ve done here in hopes that they will share ideas or reassurance.
Readiness/Exposure
There are so many different recommendations and physiological suggestions out there about when is “the right time” to start toilet learning. The most common window I’ve heard is probably anywhere from 18 months to 3 years. I really think this is very personal and situational. For our boys, I watched more for readiness signs from them to have an idea of when might be a good time to start. Some signals were:
-Asking more questions about the toilet, peeing, and bowel movements
-Showing interest in sitting on either a small toilet or the one regular one we use
-Telling me when they had a wet diaper or had pooped, showing discomfort, and/or asking to be changed
There are probably other readiness signs to consider as well, but these were the ones that both of my boys demonstrated. We also slowly built up interest and exposure. The Montessori Toddler recommends gradual toilet learning and exposure, and I really think this helped the process for us. For both Asher and Aiden, their small toilet seat was out in the bathroom for months before we actually started official toilet learning. If they were interested in sitting on it, I helped them to get on it. Even if nothing happened, it was building up comfort and normalcy. We talked about using the toilet in simple, realistic language and would also talk through this when we were changing them. Ex: “I see that your diaper is wet because you peed. Let’s change it and get you a dry one.” We also read books about using the toilet that I will share a bit more about below.
“Official Toilet Learning” Start
Although we build up slow exposure in some ways, we also pick a time for an “official toilet learning” start. Montessori from the Start recommends choosing a time that fits within your child’s interest and readiness as well as a time that fits well in the parents’/caregivers’ schedules. The toilet learning process can take a number of weeks and it’s important to be able to maintain consistency as much as possible.
For both Asher and Aiden, we had our official start on the weekend so that my husband wouldn’t be working and we could devote time to each of the boys. I also started at times where I knew we’d mainly be at home anyway so that they could have quick and easy access to the toilet as well as go without undies or pants for as long as needed. Montessori from the Start also recommends that children can be naked for the first days of toilet learning so that they can better understand the sensation of getting wet and the lack of a diaper. This period lasted about 2-3 days for each of the boys at the beginning of their official start.
Preparation
I’m somewhat of a perfectionist and an over-analyzer, so being prepared comes naturally to me. But, I also really believe in the importance of a prepared environment and the prepared adult. Feeling prepared ourselves and having the environment setup for success has always helped make experiences, activities, and processes smoother for everyone both with my boys at home and in my previous teaching life. Here are some things we do for preparation before the “official start of toilet learning”:
Buy Underwear
-Buy underwear that will fit. Taking your child to pick out their own underwear would be best-case scenario in my opinion so that they can choose which one’s they’d like and have an active role in the process. However, this doesn’t always work out depending on situations. When Asher started toilet learning, Aiden was a newborn and it was difficult to get them out to the store. So, my husband found some choices on Amazon and Asher picked out two different sets from those. Now, I’ve still been avoiding stores due to COVID-19 and pregnancy. So, when Aiden had his official start recently, I showed him the two different sets we had from Asher and let him pick from those. Anyway to improvise and find some way to include them in the decision-making process is what I find works best for this!
Toilet Seat
-Have a toilet seat ready for them. As mentioned above, it worked best for us to have a toilet ready for months before we actually officially started. That way, the “learning” part of toilet learning was built up slowly and could feel more familiar. I specifically chose this miniature toilet because Asher loved to do everything that we did and was so interested in flushing the toilet. It looks like a mini version of a regular toilet and it even makes a flushing sound. Our bathroom is pretty small, but it fit against the wall perfectly! Also, with a newborn at home also, I wanted him to be able to have as much independence as possible. That being said, I know many who have used a toilet seat like this from the start with their toddlers, had great success, and really liked it. Again, go with whichever option fits your family and your child’s preferences.

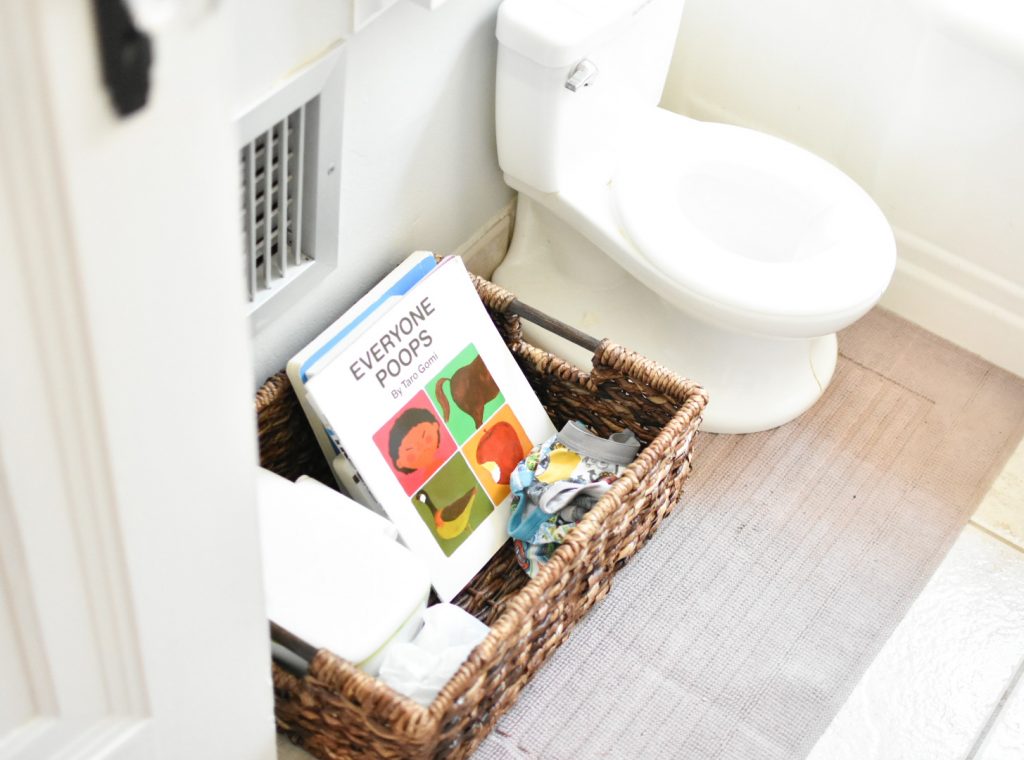
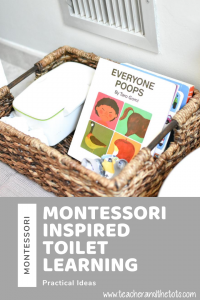
Bathroom Basket
-Have a bathroom basket ready. This one certainly isn’t a must, but it did make things so much simpler for both me and the boys both times I’ve done toilet learning. Our basket sits on the floor right next to the mini toilet. It includes books (some about using the toilet and some they just love, I rotate these every so often), wipes, plastic bags, and a couple of pairs of clean underwear. The books are useful while we spend lots of time sitting together in the bathroom. The wipes, bags, and clean undies are useful when any cleanup and changes are needed. It helps me to have everything in one place!
Books About Toilet Learning
I’m pretty choosy about books related to toilet learning, and to be honest, I haven’t found a ton that I love. These are a few that I like and I will add more as I discover them.
one | Everyone Poops
two | Potty
three | Time to Pee
four | Why Do We Need a Potty?
five | What Is Poop?
Other Toilet Learning Preparation
Here’s a few other options for preparation that we have used. Certainly not all are exactly Montessori and not all are necessary, but they are what helped us to have success.
Pads/rubberized flannel– These were helpful for setting around the house so that the boys could go about their usual daily activities and our couch, rugs, etc. would be protected. They are also useful in bed for nap time/nighttime. These are some pads that are highly recommended, but I bought sheets of rubberized flannel at a local fabrics store.
Travel Toilet– Not necessary, but really useful to us when traveling, in the car, and even outside. I purchased this toilet along with this reusable liner for Asher to use when we went to Europe last summer and it’s been one of the best purchases I have ever made! This has been everywhere with us: in the car of course, on boats, planes, in the backyard, and more. We use this regularly for Aiden right now.
Pull Ups– We used Pull-Ups for both Asher and Aiden at nighttime, so I like to have some of those purchased and ready. For nighttime for Asher, we waited until he was consistently staying dry throughout the night (sometime shortly after he turned 3) and then transitioned to underwear at night instead. This was a really smooth transition and I felt like this approach helped with timing it when he was ready for it.

Other General Tips and Practical Ideas
Put Away the Diapers
Once we start our “official” toilet learning period, I put all of the diapers we have left out of sight. I think this helps to make the transition clearer and it eliminates any visual confusion with the diapers. We picked place to put the underwear together in the dresser where the boys could reach them (same with the Pull-Ups). I use phrasing like, “You’re growing older and you’ve been telling me when your diaper needs to be changed. Because you can do that now, we’ll start wearing underwear and peeing/pooping on the toilet.”
Use a Timer
We also use a timer set at intervals for the first week or so of “official toilet learning”. This helped with consistent reminders to try to use the toilet. The first few days of “official” toilet learning, we set the timer for every 15 minutes. It is a LOT of time in the bathroom and consistency is huge. After those first couple of days and built success with every 15 minutes, we slowly expand those intervals out for every 20, 25, 30 mins.
Now, at about 3 weeks in with Aiden, we give reminders to try to use the toilet after wake-ups, before leaving the house, before/after meal times, when we get back to the house after being out, and before sleep times. Sometimes he doesn’t need to use the toilet at those times. Then he will say “No, me fine.” or “Me don’t need to pee.” and he usually tells us when he does need to use the toilet at this point. Both of the boys liked helping to “set” the timer and I think this further involves kids in the process. We mostly use our phone timers so they pushed the buttons to stop and start the timer. A sand timer would be another great option and visual cue that toddlers could help with flipping and starting as well.
Toilet Placement
Ok, this one is certainly not “Montessori recommended”, but it has helped us tremendously with toilet learning. While still wearing diapers, my boys both had a certain place or corner in the house where they liked to poop. In the transition of learning how to do this on the toilet instead, it helped immensely to sometimes place the mini toilet seat in that spot. It added an element of familiarity (the corner or place they were used to) to an element of unfamiliarity (the toilet seat).
When Asher was going through toilet learning, he would often poop during nap time, which meant lots of clean-up. He was on a floor bed and had the freedom to get up and use the toilet, but having the toilet in the bathroom was too far away and not visually concrete enough for him. So, we moved the toilet seat into his room during nap time for awhile. This worked so well! He would get up and use the toilet if he needed to, and then let us know so we could come in and help with wiping and cleanup. We eventually moved the toilet out of his room as he became more successful and comfortable, but it definitely helped in the transition! Other than these times, we keep the toilet in the same spot in the bathroom.
These are some of the Montessori-inspired and general practical steps that have helped us with smooth and successful toilet learning for both Asher and Aiden. As with all things, I strongly believe every kid and situation is different and development and things that work well with toilet learning can differ. I’m just sharing our experience of what has worked well for us and recommendations I’ve read about over the years. If you have questions, please feel free to leave a comment, email me or connect with me on Instagram and I’d be happy to chat!
As an affiliate partner, this post contains links to products we love at no extra cost to you.
Leave a Reply